A few of you over the last months have emailed me with makeup questions. I love those! So I promised the lovely Rae of the Spring Top Week fame to write a few posts on the subject. Now, faced with an empty square to fill I wonder where to start, because you know, when I talk makeup I can't seem to shut up anymore. As somebody ever asked you the desert island question? What would you bring if you could only take one thing? I ask myself this all the time but with makeup instead. I have narrowed it to three things:
Blush, lip balm or lipstick, a black eye crayon.
In truth you need much much more to create a killer look but these are the things you should put on when leaving your house in a hurry, even if you are already late. It's not being vain, it's being armed to face life's unpleasantness with your slightly better face forward. It's all about saying, look I made a minimal effort and so should you (help me move this, get out of there quickly, etc..). For example, today I locked Finn is the car and looked pretty put together while at the same time frantic!
So for now I will just show you a super easy and affordable look that requires not much more than the three essentials above. This look works well after an airbrush tan, which is what I have on. If like me you like to pretend it's already summer, even while still on skis, you can get a faux tan and you'll not only look supernaturally healthy, you won't even have to worry about wearing foundation anymore. Oh, and you loose about five pounds instantly in the process, it's magic! (airbrush tan by St Tropez).

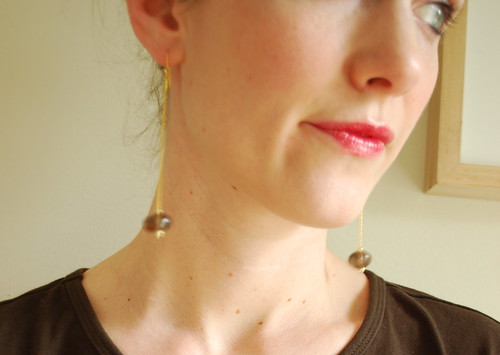
I chose this picture because you can see the corner of the eye well. Earings, from a trip to Mexico. Tee, Boden.
The goods and how to apply them:

Start by applying a very dark pink blush. Mine is Escape from Bare Escentual. I feel it's a good value because the jar is very large. Don't be afraid to use a lot of product because blushes all tend to fade on us quickly. Use a medium to large angled brush to pick up product, work it deep into the brush and make a smiley face. Start at the bottom of your cheek, apply most of the product there to the meaty part and work it upon the bone a bit. If you feel that you applied too much you can take some away with a clean kabuki ( big fluffy brush).
Move on to the eye. I like this look because it requires no mascara. Wearing mascara everyday is hard on my lashes and I find that wearing crayon instead is almost better at thickening the lashes. You will apply the black crayon to the water line above the lower lashes and under the upper lashes. It is the grossest, weirdest thing you'll ever do but if you close your eyes almost completely while marking the top line you will be fine. It's important to cover the inner eye well and not slip across the lashes and on the lid. Remember that you are staying inside the water line. I used NYX, I had picked it up to try it out. It's very easy to put on but runs a lot after a while. I will try a fancy Urban Decay one soon and report about it. Unless anyone knows a crayon that won't bulge?
Now apply lipstick, this one is Mulberry Shimmer by Ulta, $4 on sale. It doesn't taste great but stays on well. At this point you could be done. I could not because using only three products and one brush leaves me deeply unsatisfied. So I add an highlighting powder to the orbital bone, from under my eyes, following the top of the cheeks to the outer eye and below the eyebrow. It's very subtle but catches the light just a little.
So here you have it, a very long post indeed! If you want more here are a few subjects you might want to read about, please let me know in the comments:
brushes, which ones are worth it, where to buy.
Products, foundation, blush, mascara, lipstick etc...
Online tutorials by people I like.


